How to Spot Damage in Fiberglass Auto Body Repair

Fiberglass is a strong and lightweight material that is used in the bodies of many cars. It can be repaired if damaged, but it requires special attention to detail and the right materials for a durable and professional repair.

Fiberglass Auto Body

The first step is assessing the damage. This involves looking for surface cracks and holes, as well as examining deeper structural issues that may be compromised by the fiberglass patch. Visit https://www.juanitosautobody.com/ to learn more.

Fiberglass is an incredibly versatile material, used to construct everything from home insulation to automobile body panels. This lightweight, durable composite is a popular choice for many cars, and it’s likely that most auto body repair students will see fiberglass spoilers, hoods, and other components throughout their careers. Unfortunately, fiberglass is prone to cracking and can become damaged easily. It’s important for car owners to know how to spot damage in fiberglass and have it repaired properly to ensure that the vehicle continues to be structurally sound.

As a first step, the repair process involves assessing the extent of the damage. While it’s easy to notice surface scratches and blemishes, deeper structural issues can be harder to identify. Inspecting the entire surface for signs of moisture, cracks, or delamination is essential. If you discover any of these issues, it’s a good idea to bring the car to an experienced professional for an inspection and full repair.

Once the damage has been assessed, it’s time to gather your materials and prepare for the repair. Most body shops will have all the necessary supplies, but you’ll need to purchase a few items if you’re going to do a DIY repair. Most importantly, you’ll need fiberglass mat and cloth, polyester resin, and a catalyst. You’ll also want to have a set of scissors, brushes, and small containers for mixing the resin.

The first step in repairing fiberglass is cleaning the area and removing any rust or dirt. After that, you can use body filler to patch holes and cracks in the fiberglass, ensuring that it adheres to the existing material. Once the filler has dried, you’ll need to sand the area smooth and clean away any excess filler.

Once the sanding and preparation is complete, you’ll need to apply a layer of fiberglass cloth and a coat of resin to the damaged area. This will seal and strengthen the fiberglass, allowing it to withstand harsh conditions without breaking down. Once the fiberglass has cured, you can paint it to match the original color of the car.

Preparing the Surface

The strength and durability of fiberglass make it an ideal material for a variety of automotive repair needs, from patching small scratches to restoring cracked body panels. When damaged, though, fiberglass requires a specialized repair process that ensures the integrity and appearance of the vehicle remain intact. This specialized approach involves several steps, from assessing the damage to sealing the final coat of paint, that help to ensure that the repaired section is as strong as, if not stronger than, the original fiberglass.

To begin the repair process, technicians will need to clean the area that will receive the new fiberglass material. This step is essential because it helps to ensure that the resin and fiberglass materials bond properly with the surrounding surface. Typically, the technician will use an acetone-based solvent to remove any dirt and grease from the affected area.

Once the area has been cleaned, it will need to be roughed up to ensure that the new fiberglass will adhere properly to the surface. This is done by using a sander, normally a heavy-grit sandpaper such as 280 grit.

Once this has been completed, the technician will apply a bonding agent to the area, which is used to ensure that the new fiberglass material is fully bonded with the surrounding surfaces. This also provides an extra layer of strength that is important for a lasting repair.

Finally, the technician will sand the body filler again, this time with a coarser grit. This is to prepare the surface for priming and painting. A polymer primer should be used at this point, such as Eastwood’s 2K primer. It is a good idea to choose a primer that matches the final topcoat color, so that there are no surprises when it comes time for the paint to be applied.

While some people may be tempted to skip this step, it’s important that the repair area is properly sanded before being primed and painted. Not only will this ensure that the paint will adhere properly, but it will also prevent the body filler from absorbing moisture and potentially shrinking or cracking in the future.

Applying New Fiberglass Layers

Whether you’re restoring a fiberglass boat, modifying a custom vehicle, or repairing a damaged car body panel, the right techniques and materials can make it easy to repair and maintain fiberglass structures. From assessing the damage to sealing the final coat of paint, the following steps will help you achieve a durable and professional result.

Fiberglass is a resilient material that can be easily shaped and molded to fit any repair area, making it an ideal choice for auto body repairs. Unlike metal, it resists corrosion and rust, making it an excellent choice for areas that are exposed to salt and other harsh chemicals. Fiberglass is also lightweight, allowing you to remove damaged or heavy panels from the frame and install lighter replacements without compromising on strength.

The first step in repairing fiberglass is to clean the surface and remove any rust or debris that may interfere with the bond between the resin and fiberglass material. A solvent cleaner or degreaser is recommended to ensure the area is thoroughly cleaned and free from contaminants. After cleaning, it’s important to sand the entire surface to create a rough surface that helps the new body filler adhere and hold securely. It’s recommended to use a 36-grit sanding disc that is coarse enough to quickly remove the old bonding adhesive and fiberglass, but not so coarse that it damages the original fiberglass material.

Next, apply a layer of body filler to the repaired area. Allow it to dry for a few hours before applying a second thin layer. When applying the body filler, be sure to work in a well-ventilated area and wear appropriate safety gear to protect yourself from fumes and particles.

After the body filler is fully cured, it’s time to start adding new fiberglass layers. Cut several pieces of fiberglass cloth that are about one inch larger than the cracked or holed area. Mix the resin and hardener according to the manufacturer’s instructions. Using a brush or roller, apply the mixture to the fiberglass cloth and press firmly, ensuring that it adheres securely to the damaged area.

Finishing the Repair

Whether your vehicle was damaged in an accident or by a severe weather event, the body shop process for fiberglass auto repair restores the strength and appearance of your car’s damaged panels. From the initial assessment to sealing the final coat of paint, skilled technicians perform several key steps that ensure the results are durable and professional.

This stage involves the careful disassembly and assessment of any parts that need to be replaced or reshaped. The technician also cleans and sands the area that will receive the new fiberglass to prepare it for bonding with the rest of the car’s structure. Once the preparation is complete, the technician applies a layer of fiberglass resin to the affected area, often mixed with reinforcing fibers, to rebuild the broken section. The resin then cures to form a strong, weather-resistant patch over the damaged surface.

To finish the fiberglass repair, the technician smooths the surface to blend it seamlessly with the surrounding panel. This requires a combination of techniques, including sanding with coarser grits to remove high spots and shape the contours. The technician may also use body filler to fill low spots and correct imperfections. Attention to detail in this phase significantly impacts the quality of the finished result.

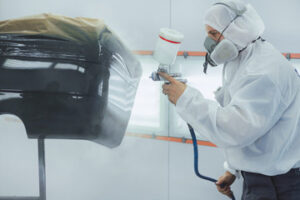
The next step is to apply a primer and then a coat of paint that matches the existing color. This is a critical part of the repair process, as it ensures that the repaired area blends in with the rest of the car’s surface and maintains its structural integrity. After the primer and paint have cured, the technician sands the repair once again to smooth the surface and prepare it for a flawless finish.

Fiberglass is a versatile and durable material that’s widely used in the construction of cars, especially classic or custom vehicles. While fiberglass is often considered to be a lightweight and weak material, it’s actually more resistant than metal to dents and corrosion. It’s also a great choice for bodywork and cladding, as it can be formed into sleek and functional shapes that enhance the appearance of your car.

Starting a Handyman Business

Handymen offer a broad range of home improvement and repair services, sparing you the expense of hiring multiple specialized contractors. They guarantee quality work and often provide a warranty.

Handyman

Handymen are expert at assembling flat-pack furniture, saving you the hassle of reading convoluted manuals. They can also mount shelves to meet storage needs and install trim or molding, enhancing the aesthetics of your home. Contact Handyman Mesa AZ for professional help.

Starting a handyman business comes with numerous challenges, but it can also have many rewards. The ability to work from home, set one’s own schedule and earn a substantial income are just some of the advantages of this career choice. The key to success is planning carefully, developing the right skills and marketing yourself effectively.

Establishing a robust business structure is a vital first step to getting started. The entity chosen impacts everything from liability to taxation, so it’s crucial to consider the options and consult with an expert. A well-thought-out business plan is also an important part of this process, and helps you gain insights, secure funding and guide your decisions.

A solid client base is the cornerstone of any successful handyman business. Creating this foundation involves strategic networking, partnership building and exemplary customer service. Ultimately, these strategies help you build a loyal clientele that enables you to grow your business over time and reap the rewards of repeat business and referrals.

Effective financial management is another key aspect of a handyman business’s success. Managing cash flow, setting and reviewing financial goals and ensuring that your business is adequately insured are all integral to your handyman’s fiscal health. Mastering these elements lays the groundwork for future growth and ensures that your business is resilient in the face of unforeseen economic challenges.

It’s also essential to develop a pricing strategy that’s competitive but sustainable. A thorough analysis of costs and overheads, as well as the value your services provide to customers, can help you determine how to price your products. Taking a proactive approach to pricing is essential, and can help you stand out in a crowded marketplace.

Finally, it’s a good idea to explore untapped markets and diversify your services to increase the profitability of your handyman business. A willingness to adapt and seize new opportunities can take your handyman business from a local service provider to a distinguished brand with a strong community presence. It’s important to be able to scale your operations in tandem with demand, while maintaining the high levels of quality and service that have made you successful.

Preparing the Workspace

Handymen are skilled in a wide variety of tasks, making them valuable for home improvement projects. They can do everything from plumbing and electrical work to carpentry and painting. Rather than hiring multiple specialists, handymen can complete complex jobs that are too difficult for other contractors to handle.

For a successful project, it’s important for the handyman to have an effective workspace. Clearing the area and having any necessary tools ready reduces the risk of accidents and makes the job more efficient. Additionally, a list of the project’s specific instructions helps prevent miscommunication and ensures that all necessary steps are taken.

Assembling new furniture can be challenging and overwhelming, but a handyman is able to streamline the process by following the manufacturer’s instructions and laying out all components before starting work. This allows the handyman to efficiently and effectively assemble the piece, ensuring that it functions properly and looks great.

To protect your property from water damage, handymen clear gutters and downspouts, preventing blockages that lead to flooding, mold, and wood rot. Their expertise in this critical task safeguards the longevity and value of your home, shielding you from costly repair bills.

Handymen are also proficient in repairing and installing window and door hardware, enhancing the security, energy efficiency, and visual appeal of your home. Their experience with these components helps to keep your family safe and comfortable, while reducing wear and tear on the hinges and latches over time.

When walls or ceilings are damaged by water, handymen apply expert patching techniques to transform them into a seamless surface, suitable for painting or wall coverings. They can even fix or replace faulty light fixtures, refreshing the look of your space and improving its functionality.

Handymen with a vision for the future are able to adapt to industry changes and set long-term goals. These plans may include continuing education, attending workshops, and acquiring certifications to keep skills current. They also consider how they will transition their business in the future, whether through training a successor or selling it to another entity. These foresightful efforts are vital for the growth and success of a handyman company.

Getting the Job Done

Handymen have a wide range of skills and tools that allow them to address many different kinds of problems, including electrical issues. They often have experience installing new fixtures, lights and outlets, and repairing faulty wiring. They are also able to fix basic plumbing problems such as leaky faucets and clogged drains, helping to prevent water waste and damage.

When looking for a reliable handyman, it is important to get estimates from multiple sources. Prices can vary significantly, so it is important to find a professional who offers quality work at a reasonable price. In addition, it is a good idea to ask about the handyman’s credentials and past work.

Before hiring a handyman, homeowners should consult local ordinances to understand what kind of tasks are permissible. It is also a good idea to verify that the handyman has liability insurance in case something goes wrong during the job. Finally, homeowners should check if a permit is required for the job and if so, make sure the handyman obtains one.

In addition, homeowners should cover or move items that are not in the work area to protect them from dust, paint and debris. They should also remove valuables from the work area and, if possible, consider moving them to another part of the home while the work is being done. Finally, homeowners should cover or wrap furniture to protect it from scratches and dents.

A licensed handyman can tackle a variety of different projects around the house, from minor repairs to major renovations. They have the skills and tools to handle a variety of tasks and can help save homeowners time by taking care of several jobs at once. Handymen can be hired for painting, drywall repairs, plumbing repairs, electric and roofing jobs, among other things.

Using CRM software can streamline the entire process of managing a handyman business, from scheduling appointments to invoicing. Method CRM’s mobile app allows you to stay in touch with customers on the go, while its centralized hub allows you to keep track of customer data. With features such as two-way QuickBooks and Xero sync, web-to-lead forms, and email marketing integrations, Method makes it easy to serve your customers. See how it works with a free demo.

Getting Paid

One of the great things about being a handyman is that it’s a perfect side hustle, since it takes only a few hours per week to generate a significant profit. This is especially true if you’re charging enough for your services. In fact, if you work five full-time hours each week and charge $95 per hour, then your monthly income would be around $11,000.

This is a very respectable six-figure income, even for someone who’s just starting out. However, you’ll want to make sure that you focus on your strengths and do not take on more than you can handle.

In general, handymen specialize in taking on small scale projects and performing routine maintenance tasks that don’t require a contractor license. This is in contrast to general contractors, who must obtain a license and permits to take on larger projects that may require specialized work, such as plumbing or electrical services.

A handyman’s hourly rates vary according to the complexity of the project, materials needed and other factors. However, the average rate is $65 per hour, with some handymen charging up to $300 per hour.

Pricing is a crucial factor for handymen to consider when starting out, as it’s important to set rates that are both competitive and profitable. Pricing too high will drive away customers, while pricing too low can leave a handyman struggling to meet operating costs.

In addition to their hourly rates, handymen should also consider their other expenses, such as advertising, vehicle maintenance and insurance. Licensed handymen should be particularly attentive to their insurance costs, as some states require them to carry liability and workers’ compensation coverage.

Many handymen will also consider incentives to attract customers, such as discount codes and referral bonuses. Incentives can help a handyman quickly build up a client base and start earning more from each job. Additionally, offering add-ons like maintenance plans can increase the value of each service and encourage repeat business.

How House Painters Can Add Style and Flair to Your Home

Modesto House Painters have the skills, tools and equipment to get the job done right. They use proper techniques and apply paint with precision, ensuring uniform coverage and smooth finishes.

House Painters

You should remove all small items from a room that is being painted, and cover furniture that cannot be moved. This will minimize the risk of breakage and protect furnishings from dust or other damage.

Painting your interior spaces is a simple way to dramatically change the look and feel of your home. It’s also one of the best ways to increase your home’s resale value. Professional house painters can add style, flair and color to your home, giving it an entirely new look.

A good home painter will have a strong focus on quality and customer service. They will be happy to answer any questions before, during and after the project is completed. They will also be able to provide references and samples of their work.

It’s important to do some research before hiring a house painter for an interior painting job. Ask friends, family members and neighbors for recommendations. You can also check online directories and websites specializing in home improvement projects for reviews and ratings of local contractors. Once you’ve compiled a list of potential painters, request estimates from each. Make sure you’re comparing estimates based on the same criteria to get an accurate comparison.

Surface Preparation

Before beginning the project, a house painter will clean all surfaces to be painted. Then they will sand them lightly to roughen the texture and improve paint adhesion. They will then wipe down all surfaces with a damp cloth, including windows and trim work (the woodwork around door and window frames). They will tape off any areas that you don’t want painted, such as baseboards and trim. Some painters use water activated tapes that will peel off with the wall when they’re ready to be removed. Others simply place a strip of rosin paper on the floor and cover it with plastic sheeting to protect it from paint spills.

The painter will then apply the primer and let it dry for several hours. Once the primer is dry, they will begin painting the walls. They will work in small sections, and blend each section with the next to avoid lap marks (lines of a different color where wet and dry paint overlap during the painting process). They will also use a specific rolling technique that ensures even coverage.

Exterior House Painters

The exterior of your home can take a beating from various factors. These include weather damage, dirt, dust, and even pests. Despite these issues, you can still boost your property’s value by regularly repainting it. This not only makes it more attractive but also protects it from other potential problems. According to the International House Painting Association, a well-maintained exterior can add up to 10% to your property’s value.

The right house painters can provide the care and attention your home needs to keep its curb appeal intact. Professionals have extensive experience in surface preparation, color selection, and painting techniques. They use quality paints that can withstand harsh conditions and last for years to come. They can also address underlying issues like mildew and rot, saving you the hassle of having to deal with them later on.

When choosing a house painting contractor, make sure that they have the necessary licensing and insurance. This includes liability insurance, worker’s compensation, and a good reputation in the industry. They should also be able to provide a warranty and references for their work. Moreover, they should have the equipment and tools to complete the job quickly and efficiently.

Painting your house’s exterior is a time-consuming task that requires meticulous prep, multiple coats, and careful clean up. In addition, working at heights and navigating challenging angles can be dangerous for individuals without proper training. This is why it’s best to leave the task to professional house painters.

The ideal time for painting a house is during early summer and fall. During these seasons, the sun is low and there’s minimal rain. Additionally, temperature variations aren’t as extreme, which can cause the paint to dry unevenly and create blemishes on the surface.

Besides, these professionals know how to properly handle ladders and scaffolding. They are also adept at navigating challenges that may arise during the project, such as hard-to-reach spots. Therefore, hiring them is the safest and most cost-effective option for homeowners who want to ensure a high-quality finish that’ll last for years. Their expertise and high-quality products will ensure that your home’s exterior will look its best for years to come.

Residential Painters

Painting is one of the best ways to add value and style to a home. Whether it is the interior or exterior of a house, a skilled paint job can transform the entire look and feel of the property and make it more appealing to potential buyers. It is therefore important to find a reliable house painter who will complete the work to your satisfaction. A good way to do this is to ask for referrals from friends and family who have used their services in the past. This will give you first-hand information about the contractor’s work ethic and quality of work.

Local house painters usually specialize in residential projects, including the interior and exterior of single-family homes. They also perform staining and detailing of architectural elements like windows, doors, and trim. They are well-versed in a variety of surface preparation techniques and apply paints using brushes, rollers, trays, ladders, and sprayers. They are familiar with a wide range of paint types and sheen levels, including oil-based, water-based, and latex-based. They also help their clients select the appropriate color and finish to achieve their desired results.

In addition to basic wall painting, professional house painters can also handle more complex tasks such as refinishing decks and fences, wallpaper removal, and power washing. They can also apply specialty finishes to wood surfaces to protect them from water and sun damage.

When choosing a house painter, it is important to check their credentials and licenses before hiring them. A licensed and insured house painter will be able to provide you with the highest quality of service while following all applicable laws and regulations. In addition, they will be able to provide you with a detailed quote that includes the exact brand and shade of paint that will be used. This will ensure that you are getting the best quality of paint for your home.

Aside from their technical skills, local house painters should also be able to communicate well with their clients and understand their vision. They should be able to guide them in selecting the right colors and finishes for their project, as well as explain how different paints will perform on specific surfaces. They should also be able to accommodate any special requests that their clients may have, such as the need to protect furniture and other belongings from dirt and dust.

Commercial Painters

Repainting the exterior and interior of a home is an important way to refresh its appearance. It also helps protect the structure from damage and prevents moisture penetration, which can lead to rot and other costly repairs. Professional house painters have years of experience with prepping, priming, and painting techniques and have an eye for what hues complement one another, so they’re a valuable resource when choosing color combinations. In addition, they’re equipped with ladders and other equipment to reach high spaces, and they have a thorough understanding of proper preparation and cleanup methods that ensure the best results.

Unlike many DIY home improvement projects, painting is a difficult task that most homeowners don’t have the tools or skills to complete on their own. Even if you are handy, painting a house requires extensive use of ladders and other equipment, and it is critical to follow proper safety procedures. Plus, the specialized paints and coatings used by professional painters aren’t readily available to the general public.

Professional painters have the knowledge and experience to apply a wide range of finishes, from flat to glossy, and can work with a variety of surfaces, including brick, stucco, and concrete. They know the right products and techniques to use in each situation, ensuring a high-quality finish that will stand up to heavy wear and tear. 

A clear scope of work is an essential part of any estimate. It details what tasks the painters will perform, any materials or supplies they might need to buy or rent, and how long it is expected to take them to complete the job. Having this information in advance will help you compare estimates and avoid any surprises later on.

Before the painters arrive, be sure to move all furniture and other items from the area. This will allow them to access the walls and other surfaces and ensure they do a quality job without any disruptions to your daily life. It’s also a good idea to remove any hanging objects from the wall and cover them with bubble wrap or similar material to protect them from damage.

Landscaping – What Happens Between Signing Off on a Plan and Completing Construction?

Landscaping Boynton Beach involves the horticultural, structural and artistic design of outdoor spaces. It includes planting trees and shrubs, laying out garden beds, changing the shape of the terrain, incorporating water features and constructing fences, walls, decks and patios.

It also involves a lot of planning, design and hard work! But before you can sit back and enjoy your new landscape, there are a few things that need to be done first.

Initial Consultation

Landscaping

The initial consultation is the first meeting between a client and a landscape design professional. It is often the most important step in determining whether or not the project will be successful. The landscape design professional should take the opportunity to get to know the client, his or her vision for the project and any goals, limitations or constraints that may be involved.

In addition, the landscape designer should conduct a site assessment on the property. This includes taking pictures and making measurements. This will allow the design professional to create a drawing that is accurate and specific to the site conditions.

Landscape design professionals should also explain the process for completing the final landscaping plan. This will help the client understand what to expect and when.

Finally, the landscape design professional should offer a fee proposal for producing the final landscape design. This will usually include the design, planning and installation fees. It is also a good idea to have this in writing, so that there are no misunderstandings later on.

It is a good idea to charge for the consultation, even if the client decides not to move forward with the project. A consultation is an opportunity to showcase your expertise and experience, so you should not be afraid to demand fair compensation for your time.

The consultation is a great way for a new client to become comfortable with spending money with you, and it will help them feel better about leaving their cash on the table in order to move forward with the project. Additionally, charging a fee for the consult will help you avoid the pitfalls of the sunk cost fallacy.

Once the landscape design renderings have been created, the landscape contractor will schedule a follow-up meeting with the client to go over them. This is the perfect time for the client to ask any questions or make any changes that he or she would like to see made to the design.

During this time, the landscape contractor will be able to give the client an estimated date for starting the installation process. However, this can be subject to change based on the weather and the availability of materials.

Design Renderings

When it comes to landscaping projects, it is very difficult for most clients to imagine what their finished landscape will look like. This is where a design rendering can be extremely beneficial. Design renderings give clients a visual preview of the project and allow them to ask questions or make changes before construction starts.

The process of landscape rendering involves modeling the layout and then creating a photorealistic scene using powerful computer systems. The model is populated with landscape elements such as trees, plants, bushes, flowers, and rock. The lighting and shadowing is then calculated so that the final rendered image or animation looks realistic and pleasing.

Detailed, high-quality landscape renderings are important to communicate design ideas and concepts to clients and collaborators in order to achieve the desired outcome of the project. Compared to traditional hand-drawn drawings or the time-consuming process of producing CAD models, landscape renderings provide a faster and more cost-effective solution for communicating and presenting design ideas.

When presented in a 3D format, landscaping renderings offer the ability to explore different angles and perspectives of your landscape project with the click of a button. These renderings also give you a better sense of scale and how your landscape will fit within the rest of your property. With the help of a well-executed rendering, you will have peace of mind that the project will be completed as designed and that it will meet all your needs.

We use the latest in professional landscape rendering software for both 2D and 3D designs. Depending on the scope of your project, one or the other may be more appropriate for your needs. Both are incredibly useful and provide clear, informative, and colorful visuals of your project for review.

Once the design renderings are completed, your designer will schedule a follow-up meeting with you. They will walk you through the renderings and explain the details of each landscape element. They will address any questions or concerns you have and discuss how we can implement them into the final project. At this point, we will also be able to guide you through a preliminary landscape installation budget for your review.

Follow-Up Meeting

After a site visit, it’s important to set aside time for in-person discussions and meet with your clients to get a better sense of their style preferences and how they plan on using their landscape. This can help you provide a more comprehensive service by exploring ways to make their abstract ideas into a reality while still meeting their needs and budgetary constraints.

Landscaping is a client-centric business, so keeping open communication throughout the project’s lifecycle is essential to building trust and managing expectations. The client may prefer to receive updates in person or through email, so it’s a good idea to be flexible and tailor your approach to the client’s preferences.

Follow-up meetings are vital to the success of a landscaping project, as they help to clarify decisions, reinforce key takeaways, and drive accountability for action items. Developing a consistent and well-executed follow-up process can significantly improve your team’s productivity.

In most cases, follow-up meetings will be conducted in person or via phone, but you can also send follow-up meeting summary emails. These emails can be helpful for both attendees and non-attendees, as they can serve to recap the meeting’s results, document action items, and ensure that all relevant parties have a record of the meeting’s outcomes.

The best way to prepare for your meeting follow-up is to draft a meeting recap that highlights the most important topics discussed during the meeting. Make sure to include any action items that were assigned and the names of those responsible for completing them. It is also helpful to include any open questions or issues that were raised during the meeting.

You should send the follow-up meeting memo within 24-48 hours after the meeting, to give attendees a chance to review the summary and ensure that they don’t forget their responsibilities. If the follow-up is an email, consider adding a link to the meeting notes to make them more accessible for all participants. Additionally, you can use Anchor AI’s Meeting Summary Tool to automatically generate meeting notes and follow-up emails for you so that you don’t have to spend time writing them yourself.

Installation

You’ve had a vision in your mind of how you want your property to look. The time has finally come to bring your landscape design into reality, and it’s important that you understand the steps that will occur between signing off on a plan and sipping drinks on your new patio.

Depending on the extent of your landscape transformation, you may need to obtain permits before starting work. The permitting process ensures that changes to your property comply with zoning laws, construction standards, and environmental regulations. Permits also provide a safeguard against any legal complications that could arise during the project.

In most cases, a permit is required when installing a new deck or pool, adding a garden shed, building a retaining wall, and changing the grade of your land. However, it’s possible that other landscaping projects may require a permit as well. In addition to permitting requirements, it’s important that you familiarize yourself with any homeowner association regulations that may affect your project. These can specify everything from access codes to gated communities to the type of plants that are allowed on your property.

Once the necessary paperwork has been submitted and approved, your contractor will begin work on the outdoor project of your dreams. The initial stage will involve site preparation, laying the groundwork for your landscape transformation. Whether this means testing soil conditions or preparing the base for hardscape features, our team has the expertise to tackle all aspects of site preparation.

Plants, trees, and other landscape elements are placed according to your plans. We consider both aesthetic and practical elements when placing each element. For example, we will select colors that complement each other and create harmony in the design. We will also select plants that are appropriate for your climate and sun exposure.

A well-maintained landscape increases your property value, and top real estate agents agree that professionally landscaped properties are more appealing to prospective buyers. Proper maintenance will keep your home looking great and reduce the likelihood of erosion and other costly problems down the road.

Avoid Common Mistakes in TV Mounting

Nashville TV Mounting allows you to keep it secure and free from accidental knocks. It also eliminates the need for a TV stand, making your space more streamlined.

TV Mounting

First, lay the TV down on a flat surface that is covered with a soft blanket or carpet (to prevent damage). Using a stud finder, locate and mark a span of two studs.

TV mounting is a great way to optimize your viewing experience and free up space on your entertainment center. However, it’s important to take time to choose the right mount for your home and consider all the steps involved in the installation process. This includes locating wall studs, properly installing the mount, and ensuring that all locking mechanisms are securely fastened. By taking the necessary precautions, you can avoid common mistakes that may lead to an unattractive or unsafe television mount.

The first step in choosing the right mount is determining the best location to install your television. Consider the ideal viewing distance, glare from windows and lights, and cable access points. Evaluate the room layout, considering things like furniture placement and how the TV will integrate with your home decor. Additionally, be sure to take into account the potential for additional features such as a surround sound system or Roku TV.

Once you’ve determined the optimal location, locate the position of the studs with a stud finder or other device. Using a stud finder helps to ensure that the mounting hardware will be placed in a drywall stud rather than a hollow wall. Incorrectly identifying the location of a wall stud can result in unevenness, instability, or even damage to your TV.

Once the stud locations are known, choose a mount that’s compatible with your TV’s VESA pattern specifications. The VESA pattern is the set of standards for the location and distance between mounting holes on the back of your TV. The VESA pattern on your TV should match the VESA pattern on the mount in order to ensure proper alignment and support.

Some TV wall mounts also include additional features, such as tilting and swiveling. Determine if these additional features are important for your viewing experience and make a note of the specific mounting capabilities for each model.

Once you’ve chosen a mount, it’s time to prepare the wall for mounting. Depending on the type of mount you’ve selected, this may involve marking a drill template or drilling into the wall with a lag bolt. If your mount is designed for a wooden stud installation, make sure that you’re using lag bolts appropriate for the material of the wall. For example, if you’re using metal lag bolts on a concrete wall, they’ll need to be secured with masonry anchors.

Preparing the Wall

If you’re moving into a new house or have an extra wall in your living room, mounting a TV can be a great way to make the space more comfortable and efficient. It will eliminate the need for a large cabinet or stand taking up floor space in your living area, and it will also make it easier to clean and dust. However, before you start drilling into your walls, it’s important to choose the right location and prepare the area. First, decide where you want to hang your TV and measure the height from the ground to the top of the screen. Ideally, the TV should be centered at eye level when you’re sitting down and can easily be reached from the couch or sofa.

Next, you’ll need to determine the type of wall you have in your home. Most modern homes are built with drywall, but older homes may have brick or cinder block walls. If you have brick or cinder block walls, you’ll need to use special anchor bolts to mount the TV.

If your home is built with drywall, you’ll need to locate the studs in the wall using an electronic stud finder or another tool. Most studs are spaced 16” apart, and you’ll want to be sure that the mounting plate for your TV will span two studs.

Once you’ve determined the stud locations, mark them on the wall with a pencil. Then, take the wall bracket and place it over the marks to ensure that it will be able to support your TV. Most wall brackets have screws that will be used to attach it to the wall. Make sure that the holes in the bracket line up with the holes in the studs so that the mount is secure and will not move or shift on the wall.

Using a drill, screw the wall bracket to the studs in the marked spots. You should feel some resistance when you’re screwing into a stud, but if you don’t, it could mean that you missed a stud and will need to adjust your wall mounting position.

Hanging the TV

Once you’ve determined the best location for your TV, figured out how you’ll manage its A/V and power cables, and purchased the necessary mounts, it’s time to actually hang the thing. This is an easy enough process, but doing it right can make all the difference in a clean-looking installation that won’t wobble or damage your TV.

First, carefully lift the TV to its desired height (or slightly higher). This is important because you’ll be able to see the mount plate better at this point, and you’ll want to ensure that the mounting screws aren’t too tight, which can damage the chassis or strip the screw heads. Next, mark the location of the plate on the wall with a pencil or painter’s tape. Then use a cordless drill to create pilot holes in the locations marked with a pencil. Make sure the holes span two or more studs.

At this point, it’s helpful to have another person help you if you can — especially since some mounts require the TV be secured to the frame with heavy-duty wire ties. You should also be cautious when lifting the TV, holding it by its outer bezels instead of its screen. The screen is extremely fragile, and touching it can easily damage it.

Depending on your wall type, you may need to install masonry anchors or screws rated for your TV’s weight. For example, brick and concrete walls typically require more substantial hardware than drywall. Follow the manufacturer’s instructions for marking and installing the anchors or screws.

If you’re mounting your TV over a fireplace, be sure to purchase a special fireplace bracket. This will allow you to lower the TV down when you’re not watching, and then raise it back up to a comfortable viewing height. You can even use it to hide any cables you need to run behind the fireplace.

Adjusting the Angle

A TV mounted too high up on the wall can cause neck strain and headaches. You can avoid this by determining the right angle before you install the mount. The ideal height for a TV depends on your personal comfort level, sofa height, distance from the screen, and whether you tend to slouch when you watch TV or recline. To figure this out, measure your approximate seated eye height from the floor and use that to calculate where the center of the TV should be on the wall.

Once you have determined where to mount the TV, it’s a good idea to try out different angles to see what works best for you. This is especially important if you will be watching TV in a room with several people. It’s easy enough to ask a few friends or family members to help you out by holding the TV up in each potential mounting position while you sit on the couch to find what’s comfortable.

You can adjust the tilt of your TV mount by loosening the adjustment knobs or screws with a screwdriver or wrench. Then, gently move the TV to your desired angle and tighten the knobs or screws back up. Be sure to tighten them enough to keep the TV secure, but not so tight that they are difficult or impossible to move.

Some people also choose to tilt their TVs down a little in order to reduce glare or reflections on the screen. This can be particularly helpful if you’re watching TV in a room with windows or lights that create distracting glare on the screen.

While the optimal viewing angle will vary from one person to the next, most experts agree that the bottom of the TV should be at least 1/3 to 1/2 of the way up from the floor. This is a general rule that will work well for most rooms, but you may need to make adjustments based on your personal comfort level and the layout of your space. For example, if you have stadium seating in your living room, the center of the TV should be at about seat height, while a bedroom TV may need to be higher up on the wall since you will be watching it while lying down.

The Benefits of Landscape Lighting

Adding landscape lighting to your property offers a wide variety of benefits, including increased safety and curb appeal. The right lighting will also highlight water features, yard sculptures and more.

Landscape Lighting

Your wired lighting system consists of a transformer, low-voltage electrical cables and light fixtures. The transformer converts 120-volt home electricity to the lower voltage needed for landscape lights. Click Here to learn more.

Creating a beautiful landscape lighting design takes into consideration several different factors, including brightness. You want your lights to be bright enough to illuminate the objects they are targeting, but not too bright as to oversaturate or wash out your subject. A lighting professional will work with you to determine the best luminance levels, referred to as lumen output (versus wattage which is more common with antiquated halogen bulbs).

The right luminosity helps achieve the desired aesthetic and effect. For example, you will likely need to use lower luminosity for softer, more romantic effects and higher luminosity for a dramatic or contemporary look. You will also need to consider the size of your subject, as some subjects are more difficult to light than others.

Using the proper luminance also helps you avoid excess energy consumption and reduces impact on the environment. LED fixtures with a lower-intensity output produce less heat and are more eco-friendly than traditional options. Installing motion sensors and timers ensures lights are activated only when needed and that they aren’t left on unnecessarily, further reducing energy consumption and impact.

Another way landscape lighting impacts the environment is by reducing crime, vandalism and other undesirable activities. Studies have shown that well-lit homes and yards are far less attractive to burglars and other nefarious criminals than those in the dark.

Professionally installed and maintained landscape lighting makes outdoor living spaces usable day and night, allowing you to get the most out of your property. This increased enjoyment also adds value to your home and is a great selling point when it comes time to move on.

Landscape lighting can also emphasize the architectural elements of your property, highlighting textured surfaces and bringing them to life. For instance, you might highlight a water feature like a fountain or pond to show off its shape and movement or you can highlight planter boxes, walls, flagpoles, trellises and other structures to draw the eye up and add depth to your design. You can even illuminate your stairs and deck railings for safety to avoid tripping or slipping on them in the dark.

Power Source

An effective landscape lighting design can be visually appealing and increase your property’s value. However, it can also strain your budget due to high electricity costs. Choosing energy-efficient options helps lower energy bills while reducing carbon footprints. Adding smart features like timers and motion sensors reduces unnecessary lighting and saves you money.

Illuminating pathways and architectural elements adds depth and dimension to your landscape, while highlighting trees, plantings, water features and flagpoles enhances the beauty of your home or business. Incorporating safety lighting into a system ensures you and your guests can safely navigate through outdoor spaces at night without fear of injury.

LED lights are more energy-efficient than traditional halogen bulbs, which can waste electricity and cause light pollution by shining into the night sky. They emit a warm, natural-looking glow and use less energy to produce the same amount of brightness, minimizing environmental impact. Be sure to check local regulations for lighting requirements such as permitted wattage limits and light pollution restrictions.

Depending on the location of your landscaping, you will need to determine how many lights can be run off your transformer power spec (watts). Calculating this number is simple by multiplying the total wattage of the lighting fixtures by their voltage amps – found on the label of the transformer box. If you are using a kit that has everything you need, this step is already done for you!

The right installation sets the stage for a successful lighting system, but maintenance is key to sustaining efficiency. Keeping up with routine tasks such as replacing burnt-out bulbs and troubleshooting common issues will keep your fixtures running well into the future.

The landscape lighting experts at Unique Lighting have years of experience designing and installing custom systems that make your property stand out. We can help you find the perfect solution to complement your property, improve security, enhance your curb appeal, and illuminate those areas where you love spending time – even after the sun goes down. Give us a call today to get started! Or, order a landscape lighting kit to get your project up and running quickly and easily. The kits include all the lights, power unit and wire you need to get started.

Durability

When a home is properly illuminated, the exterior architecture and landscaping are showcased. This adds value to the property while also making it safe and appealing. This is why the landscape lighting system is one of the most sought after options for homes and commercial properties.

The type of fixtures chosen and how they’re used play a crucial role in the durability of a landscape lighting system. For instance, LED bulbs are known for their long lifespan and energy efficiency. They’re also a good choice because they help keep outdoor spaces looking fresh and vibrant for longer. Additionally, choosing low voltage fixtures helps to prevent potential shock hazards.

It’s also important to consider how much a lighting system is going to cost over the course of its lifetime. By choosing a durable, energy-efficient system, homeowners can save money over time and reduce the stress of rising electricity costs. Additionally, using smart technology such as timers and motion sensors can optimize the usage of your landscape lights, further reducing energy consumption.

Durability is also important for landscape lighting because it’s often exposed to a lot of weather conditions. Wind, rain, and snow can cause damage to your outdoor lighting if it isn’t resilient enough. For this reason, you’ll want to choose fixtures that are made of materials like stainless steel or aluminum that can withstand harsh weather conditions. Moreover, you should look for fixtures with an IP rating that indicates how well they can resist dust and moisture.

In addition to durability, a great landscape lighting system should be easy to maintain. This means regularly inspecting and replacing burnt out bulbs, assessing wiring for signs of damage, and scheduling seasonal adjustments to maximize efficiency and performance throughout the year.

Another benefit of landscape lighting is that it provides a sense of flexibility and can be added to gradually as the budget or exterior space allows. This can make the entire process less stressful and overwhelming from a financial perspective, especially for homeowners who may be nervous about the initial investment. Additionally, the ability to adjust and move lights as needed can save on installation costs and increase the overall effectiveness of the lighting system.

Smart Capabilities

Unlike traditional lighting systems that use fossil fuels, LED landscape lights are powered by the sun for an eco-friendly, sustainable solution. Additionally, these fixtures can be programmed to turn on only when movement or a timer is detected, which reduces energy consumption and utility bills. The low-intensity of LED landscape lights also limits light pollution, promoting a more natural and inviting ambiance for your property.

Landscape lighting enhances your home’s architectural features and elevates your outdoor living spaces with innovative capabilities. In addition to illuminating walkways and ensuring safety, landscape lighting can highlight focal points like trees and water features while creating an appealing ambiance. These features add depth to your landscaping and bring a new level of visual interest after the sun goes down.

Before installing a landscape lighting system, it’s important to consider the specific purpose of your space and what you want your lighting scheme to achieve. For example, using spot lights to illuminate a tree is ideal for highlighting the shape and color of an interesting feature, while floodlights are best for illuminating pathways. Additionally, you’ll need to think about the angle of your lighting so it doesn’t create light pollution or oversaturate your garden.

Once you’ve established your landscape lighting goals, a professional will help you find the perfect solution for your needs and budget. Choosing high-quality LED bulbs and positioning fixtures properly will maximize energy efficiency, while making sure your lighting scheme meets local regulations and doesn’t interfere with wildlife or light pollution.

Investing in energy-efficient landscape lighting is a great way to make your home and garden more environmentally friendly without hefty renovation costs. The right installation sets the stage for sustainability, while regular maintenance and proper care will ensure optimal performance.

While DIY options are available for those with the time and skillset to tackle it, hiring professionals ensures your energy-efficient landscape lighting system is installed correctly and meets local regulations. They can also provide valuable guidance for maintenance and troubleshooting, allowing you to get the most out of your investment.

The Skills and Tasks of Professional Electricians

Midland MI Electrician hones their skills with hands-on work that demands meticulous attention to detail. The career also offers plenty of opportunities to specialize in a variety of technologies, from smart home energy systems and EV chargers to industrial facilities maintenance.

Electricians

Some electricians choose to operate as independent contractors, enjoying increased flexibility over how, where and with whom they work. Others prefer the security of working for a contractor or electrical business.

Those who want to become an Electrician must undergo a rigorous training program. In addition to classroom theory, they must also take part in hands-on practice work. They must learn to read blueprints and electrical wiring schematics in order to install, test, and repair equipment. Additionally, they must be comfortable working in tight and cramped spaces. Finally, it’s important for them to have good physical stamina because this job requires a lot of standing and walking.

The career of an electrician is both challenging and rewarding. It is an excellent option for those who enjoy variety, precision, and following safety protocols. In addition, it offers plenty of opportunities for advancement and new challenges.

In this career, electricians can choose from a range of specializations such as residential, commercial, and industrial. To make the most of these options, it’s crucial for them to have excellent communication skills. This includes clearly writing their ideas and thoughts, as well as collaborating with other teams of employees.

It is also important for an electrician to have strong customer service skills. They must be able to answer questions, address concerns, and provide accurate information. In addition, they should be able to explain technical aspects of their work in a way that is easy for customers to understand.

A keen eye for detail is essential for an electrician, as the job can be dangerous. They must be able to notice any errors or defects in the wiring or other components before they can cause a fire. Additionally, they must be able to follow strict safety protocol at all times in order to avoid injury or death.

An apprentice must complete a specified number of hours of practical experience before they can apply for their license. This often involves working alongside a licensed journeyman electrician and learning the ins and outs of the trade. It’s a great opportunity for those who are eager to gain valuable hands-on experience. It’s also a great way for aspiring electricians to build their reputation in the industry. This can lead to future job opportunities and even more pay.

Education Requirements

Electricians install, maintain, and repair electrical power, communications, lighting, and control systems. They must have a high school diploma or equivalent, and many start their career by attending a technical school program that gives them credit toward an apprenticeship. Apprenticeship programs typically last 4-5 years and consist of paid, on-the-job training and some classroom instruction. Those with military or construction experience may be eligible for a shortened apprenticeship.

An associate degree in electrical systems technology is also available from some community colleges, and this will give you a foundation for your education in this field. You can then move on to a bachelor degree in something like business to learn the skills necessary to run your own company, or engineering to help design new power systems.

During your electrician schooling you’ll get hands-on, practical experience working with actual wiring and electrical devices. Some schools even have internships that will put you out in the field, learning to work under licensed electricians and earning full-time employment experience.

After completing your education and becoming an electrician apprentice, you can also choose to earn a journeyman’s license by undergoing on-the-job training. This will take you to the top of your profession, and it will require you to pass a rigorous exam involving knowledge of all aspects of electrical work.

It is a good idea to network with those in the industry who have experience, and you can find information about upcoming training and certification opportunities on Green Workforce Connect. Other useful resources include local trade shows, and professional organizations. Having excellent customer service skills is essential, as electricians often deal with customers directly on a regular basis. In addition, physical stamina is important for this career path, as you’ll be constantly moving and working in tight spaces. You’ll also need good color vision to identify wires by their color, and you’ll need to have critical-thinking skills to troubleshoot issues when you’re on the job. Also, you’ll need to use a digital multimeter to test for things such as voltage, current, and resistance. Then, you can determine the best course of action.

Training Requirements

The training requirements for an electrician vary by state, but most programs include a combination of classroom and hands-on experience. Coursework may cover topics like OSHA standards, commercial, industrial and residential wiring, and trade mathematics. In addition, some programs can connect graduates with an apprenticeship or other job opportunities, providing a jumpstart to a new career.

An apprentice works under a master electrician to learn the craft of electrical work. This type of program often lasts a few years and combines classroom instruction with paid on-the-job training. Students in these programs may also receive financial assistance or scholarships to help pay for their education.

Once they complete their training, electricians must pass exams to become certified. This ensures that they have the necessary skills to do their jobs safely and correctly. In addition, electricians must continue to take courses to stay current with industry changes. For example, new technologies like solar energy or fiber optic cables may require additional training to understand and install.

Hiring managers should look for electricians who have completed top-quality training programs. This means that they will be more familiar with the latest electrical code changes and safe working practices. It also means that these candidates will need less training on the job, cutting down on new-hire costs and improving overall productivity.

For example, an employer may want to consider hiring an electrician who has completed a program accredited by the National Center for Construction Education and Research (NCCER). This will make the candidate eligible for NCCER certification upon graduation, which can speed up their transition to the workforce.

Additionally, employers should ask potential candidates about their work history. This can help them determine how much practical experience they have and how well they will fit in with the company culture. Hiring managers should also focus on gauging an applicant’s interpersonal and soft skills, as these are just as important as technical ones.

Electricians can choose to start their own electrical contracting businesses, which can be a lucrative and rewarding career path. This requires a strong mix of technical and business knowledge, as well as the ability to negotiate and market services.

Licensing Requirements

Depending on the state and region where you wish to work as an electrician, there will be different licensing requirements. In New York, the process of becoming a licensed Master or Special Electrician involves a combination of education, hands-on training, and passing the required exams. While it can take time to become a licensed electrician, the payoff is considerable. The construction industry has a shortage of skilled tradesmen, and the demand for electrical services is on the rise.

The first step in becoming a licensed electrician is researching the specific requirements of your state. Each state has a board or department that oversees the certification process. Once you know the requirements for your region, you can develop a plan of action to acquire the necessary credentials.

If you want to work as a licensed Master or Special Electrician in New York, for example, you need a minimum of seven and a half years of field experience. This includes at least one year in a supervisory role. In addition, you must pass both the written and practical exam to obtain your license.

Most vocational schools offer electrical engineering technology programs that cover topics from circuitry and wiring to installation and troubleshooting. The courses are generally four to five years long, and graduates are prepared for an apprenticeship. An apprenticeship is where you will gain on-the-job experience under the supervision of a licensed electrician. The apprenticeship typically lasts for about four to five years, and you will get paid while learning the skills of the trade.

In order to qualify for the journeyman license, you must have completed an approved apprenticeship program. This includes at least 4,000 hours of on-the-job experience as well as classroom instruction. In addition, you must have two statements from previous employers vouching for your work history.

Many Master Electricians or Electrical Contractors own and operate their own businesses. Independent contractors must adhere to certain insurance guidelines, including workers’ compensation, disability, and project liability insurance. They may also need EPA certification if they work on projects that involve handling hazardous materials.

The Importance of Gutter Cleaning

Gutter Cleaning involves the removal of leaves, twigs and other debris from your gutters. It also includes flushing the downspouts and inspection for any clogs or damage.

Hiring a professional gutter cleaner means that you can rest assured the job will be done correctly. Gutter Cleaning is a lot safer and more effective when it is done before the leaves fall. Visit https://www.stlouisguttercleaningservices.com/ to learn more.

Gutter Cleaning

Gutters are designed to funnel rainwater away from a building, thereby protecting it from damage. However, if they become clogged with debris, they can’t do their job properly. This can cause water to overflow and seep into the walls and foundation of a home, leading to costly repairs. Regular gutter cleaning helps prevent this from happening and ensures that your home is well-protected.

Gutter cleaning is one of the most important maintenance tasks that can be done at home. It’s also one of the most un-fun chores, especially since it requires climbing up on a ladder and using a hose to flush out any debris. This task should be done at least twice a year, preferably in the spring and fall. If you’re willing to put in the work and are comfortable working on a ladder, then cleaning your own gutters isn’t too difficult. However, it’s important to always use ladder safety techniques like keeping your body between the side rails and working on level ground.

If you’re not up for cleaning your own gutters, it’s a good idea to hire a professional service. Not only will they be able to clean your gutters more thoroughly, but they’ll also be able to inspect them for signs of damage and make any necessary repairs.

Clogged gutters aren’t just an eyesore – they can also be a breeding ground for mosquitoes, rodents, and other pests. These pests thrive in standing water, which is commonly found in clogged gutters. If left unchecked, these pests can then spread to other parts of the house, causing further problems. Regular gutter cleaning removes these breeding grounds and keeps pest infestations at bay, minimizing the need for expensive pest control services.

Over time, clogged gutters can lead to damaged fascia boards and rotting soffits. In addition, if water is allowed to permeate through the walls of a home, it can cause mold and mildew, which can affect the health of family members and pets.

Preventing Water Damage

Gutters are meant to channel rainwater away from the structure of your home and its foundation. When they become clogged, however, water can start to pool around the foundations of your home and cause settlement cracks. Over time, this can compromise the stability of your house and lead to expensive repairs. Regular cleaning of your gutters can prevent this from happening.

Another problem with clogged gutters is that they can overflow and start to leak into your roof. This is especially a concern when it rains or snows. The leaks can cause damage to your roof, shingles, and insulation and can promote the growth of mildew and mold inside your home. Gutter cleaning prevents these problems by ensuring that your gutters are clear of debris and properly draining water.

If you’re planning to clean your own gutters, be sure to have the right tools. A ladder with a secure footing, a bucket, and a gutter scoop or garden trowel are essential items. If you don’t have a ladder, consider hiring a professional to do the job for you. They’ll use specialized tools to ensure that your gutters are thoroughly cleaned, and they’ll also inspect them for signs of sagging or damage.

Professional gutter cleaners will also use a gutter vacuum to clear out the remaining debris and dirt. They can even install gutter covers to prevent debris from entering the gutters in the first place. This will reduce the frequency of cleaning, and keep your gutters looking great for longer.

Overhanging trees and bushes can drop leaves, sticks, and branches all year long, but regular gutter cleaning can help you avoid these problems. In addition to cleaning your gutters, it’s also important to have trees and shrubs trimmed regularly to prevent them from overhanging your home. This will keep debris from getting trapped in your gutters, and it will also protect your roof from damage caused by falling branches and limbs.

Preventing Clogged Downspouts

The best way to prevent downspout clogs is to perform regular cleanings. This can be as simple as getting on a ladder and pulling out any large debris that you can see. This is usually easier on a sunny day when the leaves and debris have had a chance to dry out.

Another good way to prevent clogs is by adding gutter downspout filters. These can be bought from most home improvement stores and are a simple way to catch larger debris before it can reach the downspouts. However, homeowners must remember that these are not a permanent solution and the debris will still get into downspouts if it doesn’t make it through the filter.

If your downspouts are constantly clogged, there may be an issue with the gutter system or its installation. If you suspect this is the case, it is important to call a professional who can use specialized equipment to clean the downspouts without risking any falls or injuries.

A professional can also be helpful if you have downspouts that are hard to access. This is especially true if your downspouts extend underground or have a lot of turns that are difficult to navigate with a ladder. A professional can use a powerful plumbing auger to break up a stubborn clog and clear out the downspout. They can also repair any issues that are preventing the downspout from draining properly. This can save you a lot of time and money in the long run.

Preventing Pests

If your gutters are clogged, it’s only a matter of time before pests like rodents and birds find their way inside. They are attracted to the warm, moist environment in clogged gutters where they can build nests and hide from predators. These pests can then cause even more damage when they start chewing and digging away at the structure of your home.

Keeping your gutters clean prevents this from happening by allowing water to flow freely and keep your home safe. Regular cleaning also helps reduce the need for costly repairs and maintains the overall value of your property.

To avoid clogs, make sure your gutters are free of leaves, twigs, and debris. Check the downspouts for blockages, as well. If you can’t remove these obstructions yourself, a professional service can help. You can also avoid clogged gutters by trimming back your trees, which can reduce the amount of debris that falls into your gutters in the first place.

When gutters aren’t cleaned, water can overflow and pool around the foundation of your house. This can damage your exterior walls and the wood structure of your roof. It can also erode the soil around your foundation, leading to cracks and other structural problems. Clogged gutters can also lead to mold growth, which not only damages your home’s structure but can also be harmful to your family’s health.

Gutters are designed to channel water away from the foundation of your house, preventing damage to the walls and foundation. However, they can become clogged with leaves and twigs, making them an ideal habitat for pests. Regular professional gutter cleaning prevents this from happening, preventing pest infestation and keeping your home protected.

There are a number of ways to prevent pests from entering your gutters, including installing gutter guards and using natural repellents. These natural solutions are easy to apply and don’t use harsh chemicals that can harm your family or the environment. They also provide a cost-effective way to keep pests at bay. You can also purchase traps that are designed to capture pests without harming them. These are great for those who want to keep their home pest-free without sacrificing the safety of their pets and children.

How to Properly Maintain Your Septic Tank

Your septic tank is the first treatment step for wastewater from your home. Waste is collected and held in the tank until microorganisms break down any solids.

Aerobic bacteria (bacteria that need oxygen) digest the wastewater, which then flows into your drain field as a liquid. Contact Septic Tank Armadale now!

In a septic tank, wastewater undergoes a settling process. Heavy solids sink to the bottom of the tank, while lighter masses float to the top in a scum layer. Over time, bacteria digest these suspended solids and liquefy the sludge. Wastewater then enters the second chamber, which is aerated to support aerobic bacteria and further break down and separate remaining organic material. Finally, the separated effluent exits the septic tank into a drain field.

Most septic tanks need to be pumped every 2-3 years or as recommended by the manufacturer and your local health department. Pumping removes the sludge and scum layers from the tank. It is important that the septic tank is pumped thoroughly to avoid sludge and scum spilling into your drain fields, which can cause them to overflow and clog.

A professional can help you determine when your septic tank is ready to be pumped. They may use a gauge on the outside of the tank or they may measure the sludge and scum levels inside the tank using a special stick or rod. If you prefer, you can make your own sludge level measuring stick by attaching an 18-24 inch strip of velcro to the end of a seven foot stick.

When the septic tank is due to be pumped, it’s best if someone is at home to greet the pumper and show them where to locate and uncover the septic tank access lids. This ensures they can get the job done quickly and correctly. It also helps to communicate any specific concerns or questions about your septic system with the professional.

Depending on your household size and water usage, your septic tank may need to be pumped more or less often than others. Homes with families, including children and teenagers, typically produce more sludge and liquid waste than empty nesters or single people.

In addition to monitoring your septic tank’s sludge and scum levels, you can minimize the need for pumping by only flushing septic-safe materials. This includes avoiding flushing non-septic-safe items like baby wipes and cat litter, which are not biodegradable.

Cleaning

All of the wastewater from your home’s sinks, toilets, showers, and washing machines goes into your septic system. Solid waste sinks to the bottom of the septic tank, separating from the liquid wastewater or “effluent.” Over time, this material will build up in your tank and require pumping out. If not properly cleaned, this material can overflow into your drainfield and clog the pipes there.

To prevent overflow and ensure that your septic system works properly, it’s essential to have your septic tank cleaned every one to three years. This will remove the sludge from the bottom of the tank and ensure that all liquid wastewater is flowing out through the tank outlet into your absorption field or “soakaway.”

After a septic tank cleaning, the expert will inspect the drainfield to make sure it is free of leaks and cracks. They will also test the functioning of the septic system by using a special probe to measure the liquid levels in your septic tank. If they discover that the septic system is not working properly, they may recommend necessary repairs or replacements.

Septic tanks have baffles to control the flow of wastewater. These baffles can become damaged by septic cleaners or other harsh chemicals. Inspecting and cleaning these baffles will ensure that the septic tank flows out into the absorption field with a clear path.

During the cleaning process, your septic specialist will use a vacuum truck with a high-powered pump to empty out the septic tank. This process will take around 3 to 5 hours. They will check the inlet and outlet pipes for cracks or clogs, and they will disperse a septic tank sludge dissolver throughout your septic system to reduce future clogs.

Although you can clean your septic system yourself, it’s important to remember that powerful cleaning products like bleach, drain cleaners, and antibacterial soaps are not septic safe and can kill the good bacteria in your septic tank. To keep your septic tank clean and working properly, you can use homemade natural cleaning products. For example, pouring a cup of baking soda followed by a cup of vinegar down your drain will help eliminate odors and break down solid waste.

Inspection

If you own a home with a septic system, it’s important to inspect it regularly. An inspection will help you identify problems early, so they can be fixed before they become major issues and affect your plumbing, landscaping or health. Signs of a septic tank issue include strong sewage smells in your house, backed up drains and slow or no water flow.

A septic tank is a buried, water-tight container that holds wastewater from all household plumbing. The solid waste sinks to the bottom of the tank, forming sludge, while fats, oils and grease float to the top, forming scum. A baffle wall (also called a partition wall) separates the compartments in your septic tank, keeping most floating scum and settled sludge in one area and allowing liquid wastewater to enter the next section of the tank.

When the wastewater leaves your septic tank, it flows into an absorption field (also known as a leach field or seepage bed). The effluent is discharged below ground into the soil, where it’s absorbed by the natural soil and grass above.

There are several types of septic systems, but most use the same basic principle. They consist of a septic tank, an absorption field and pipes that carry wastewater from your home to the tank. There are also septic systems that don’t have a tank but instead consist of an underground chamber and perforated pipes that allow wastewater to seep into the surrounding soil.

An inspector will look for signs of a septic tank problem, such as a leaking or ruptured line. They will also check for proper ventilation and drainage. Inspectors may also recommend installing a vent stack to reduce the risk of odors from the septic tank.

If you’re thinking about buying a home with a septic tank, it’s important to ask the seller for the inspection records. You’ll need to know the specifications of the tank and its age, as these factors will determine how often it needs to be pumped and inspected. Additionally, your state or local law may have requirements for septic systems.

Maintenance

Septic systems are designed to handle the waste of people and pets in a way that will not cause harm to water supplies and local ecosystems. The best way to do this is by following a few simple maintenance tips and maintaining a regular relationship with a septic service professional.

The most important thing to do is have the septic tank inspected and pumped regularly. The professional will make a record of the inspection and note when the scum and sludge levels are high. This information can be used to determine when the tank should be pumped again.

In addition, it is important to have the system protected and to avoid using the septic system for things it was not intended for. For example, do not dump paints or flammable cleaning formulas down the drain; instead, dispose of them at a county-designated chemical disposal site. Avoid flushing feminine hygiene products or wipes down the toilet; they can clog the septic system and are a health risk to the environment and people.

Other important steps include keeping a map of the septic system and marking the location of its components with stakes or markers. This will help to prevent damaging the septic system when doing yard work or landscaping. Also, don’t build structures over the septic tank or absorption field, such as swimming pools, hot tubs or gazebos. It is also a good idea to avoid driving vehicles over the area, as the soil can be easily damaged.

A septic tank that is not properly maintained can overflow into the surrounding ground and contaminate nearby drinking water wells, local waterways and other property. This contamination can also affect the health of humans and animals by introducing pathogenic bacteria or viruses. Excess nutrients from septic tank wastewater can also cause algae blooms that consume oxygen in water bodies and threaten the health of fish, birds and other organisms.

A few simple maintenance steps can extend the life of a septic tank and keep it functioning as it should for many years to come. By conserving water, limiting how much is poured down the drains and spreading out water usage throughout the day, the septic system can be more efficient.

Electrical Contractors

Electrical Contractors Jacksonville NC are responsible for the intricate machinery and technology that keep industrial facilities running. They must decipher blueprints, repair complex equipment, and follow strict safety protocols.

Commercial electrical contractors focus on projects in office buildings, retail spaces, and specialized facilities like data centers. They also provide input on construction planning and assist with major installations/upgrades.

Electrical contractors play a crucial role in commercial projects. They create and design the electrical system before any wires are connected, ensuring it meets safety standards and regulations. They also work on various jobs, including installation, maintenance, and troubleshooting. These professionals use tools like pliers, wire strippers, and electricians’ hammers to construct and repair electrical systems. They can also work in environments with hazardous materials and equipment.

The types of electrical contractors vary by specialty, size and industry. For example, industrial electrical contractors are often employed by manufacturers and large-scale facilities. They may specialize in medium-voltage distribution systems, industrial lighting and wiring, or data cabling. When selecting an electrical contractor, it is important to look for one with experience in projects that are similar in size and complexity to your own. If your project requires specialized equipment or a hazard-prone environment, it is also beneficial to select a contractor with previous experience in these areas.

As the world becomes increasingly environmentally conscious, many electrical contractors are focusing on the use of renewable energy sources such as solar and wind power. New technology allows them to store energy from these sources, allowing it to be used when the sun isn’t shining and the winds aren’t blowing.

Another significant part of electrical contractors’ responsibilities is providing construction planning and estimating services. They provide input on the constructability of designs and deliver detailed computerized construction plans to project managers. This helps manage project costs and schedules, ensuring that projects are completed on time and within budget.

Whether you are building a home, renovating an office or adding power to a warehouse, it’s essential that the electrical system is installed properly. An incorrectly installed system could lead to fires, loss of productivity and expensive repairs in the future. Choosing an experienced electrical contractor is the best way to ensure that your project will be a success. The team at Bret’s Electric in Longmont can help you create a comprehensive electrical system for your commercial project that will meet all of your needs.

Installation

Electrical contractors are responsible for installing the wiring and lighting in homes, businesses, and facilities. This includes ensuring that the electrical systems are safe and up to code. They also work with designers and architects to ensure that the lighting is designed properly. This can involve installing recessed lighting, track lighting, or pendant lights. It can also include installing wiring for dimming systems and occupancy sensors.

Electrical Contractors often oversee the entire installation process. They follow a detailed plan to run wiring, set up distribution panels, and install lighting and outlets. They also ensure that the power system is properly grounded and has sufficient capacity for the building or structure.

Some electrical contractors specialize in residential wiring, while others focus on commercial or industrial projects. In either case, they must be licensed by their state or province to work in these fields. They also must complete continuing education or professional development to stay up-to-date on industry trends and technologies.

One of the key challenges for electrical contractors is finding ways to boost productivity and improve their bottom line. Increasing productivity requires embracing technology, optimizing workflows, and focusing on sustainable practices and safety. These strategies help electrical contractors achieve their goals and provide superior service to their clients.

There are many different types of contractors out there, ranging from general contractors to HVAC specialists. It’s important to understand the difference between these contractors and choose the right one for your project. General contractors tend to handle a wide range of tasks, including fixing siding and changing light bulbs. They may also bring in other professionals, like electrical contractors, to handle more specialized tasks.

While these contractors can be useful for certain projects, they are typically not the best option for large commercial or industrial jobs. In these cases, it’s usually best to work with an independent electrical contractor. This type of professional is familiar with all aspects of electrical work and can handle larger projects more efficiently than a general contractor. Plus, they will be able to provide you with a more accurate estimate of the cost of your project.

Maintenance

Electrical contractors often work with homeowners, businesses, and commercial buildings to keep their electrical systems running safely and efficiently. Their duties may include routine maintenance such as replacing light bulbs or testing outlets, or more complex repairs like repairing faulty circuits. These professionals are also able to install and repair a wide range of modern electrical appliances, including security systems, energy efficient lighting, and telecommunications equipment.

In addition to performing regular maintenance and emergency services, electrical contractors are also responsible for ensuring that the installation work they perform meets all applicable codes and standards. This can involve examining blueprints, interpreting specifications, and installing or troubleshooting control wiring from drawings. Electrical contractors also use their technical expertise to optimize production workflows and ensure that projects are completed on schedule. For example, they may implement lean construction techniques to reduce waste, utilize sourcing strategies that minimize inventory levels, or implement software solutions that allow for real-time tracking of materials.

One of the most critical functions performed by electrical contractors is ensuring that traffic signal systems operate effectively. These systems are vital to regulating vehicle movements and optimizing traffic flows. In order to meet the demanding needs of today’s high-speed transportation networks, these systems are increasingly being equipped with sophisticated sensors and controls that enable them to adapt in real time. Electrical contractors play a crucial role in designing, installing, and maintaining these advanced traffic management systems.

Choosing the right contractor for business electrical maintenance in New York City is crucial to preventing costly breakdowns and lost productivity. Taking the time to evaluate your options and choose the best company can save you money in the long run, as well as ensure that your business’s electrical system is always up and running when needed.

Regardless of the size or complexity of your business’s electrical system, it is important to have the proper maintenance in place to avoid any disruptions and maintain operational efficiency. RESA Power’s team of expert electrical contractors is NETA-certified and ready to provide you with the electrical maintenance that your business needs. Contact us today to learn more about how our services can help you improve performance and save energy.

Troubleshooting

Electrical problems can arise for a variety of reasons. Whether it’s a flickering light or a power outage in a specific area of the home, these issues should be taken seriously to avoid costly repairs later on. A knowledgeable electrician can help you troubleshoot and find the source of the problem.

To properly troubleshoot electrical equipment, it’s important to know how each of its components operate. This knowledge can help identify a fault quickly and accurately. In addition to your own experience, there are also a number of tools available to you that can make the process easier. For example, a multimeter can measure AC and DC voltages, resistance, and small flows of current. Using these tools can save you time and help narrow the field of potential faults.

One of the first steps in troubleshooting is to list possible causes for the problem. This can be done by examining the equipment and its surroundings. It’s also helpful to look at schematics, prints, and manufacturer handouts. Often, these documents will have standard symbols that represent each part of the circuit. This can speed up the process by avoiding confusion.

Next, prioritize each item in the list. Determine which are likely to cause the problem and rule out those that are unlikely. For example, if an outlet is constantly sparking or buzzing it’s most likely because of loose contact points. On the other hand, if an appliance’s lights are fading in and out, this may be caused by the appliance drawing too much electricity.

It’s essential to follow all of your company’s safety rules while testing a circuit. Electricity is incredibly dangerous and even the smallest mistake can lead to injury or death. Make sure to wear a rubber gloves when working on any live circuits and use the proper tools for the job.

Flickering or dimming lights indicate that a circuit is overloaded. This can be a result of outdated appliances or overheated wiring. An electrical contractor can help you install energy-efficient appliances to reduce your utility bills and lessen the strain on your system.